The TechMobile, v3.0
On 18-Apr-2017...
I was on my way
to work and got rear-ended on an off-ramp
(thankfully, I was not injured at all nor was anyone else). The impact
was enough to pretty much destroy the old van's rear hatch, and it also
shoved
me into a pickup truck in front. Said truck, a mid-80's Ford F250 with
bumpers which wouldn't have looked out of place on a Sherman Tank, was
barely scratched.
Unfortunately,
the damage to my rear end was, given the original TechMobile's age (17
years, out of which we got 14) and high
mileage (294K), considered to be a 'Total' by my insurance carrier.
Thankfully, I had the footage from my dash-cam to prove, conclusively,
I was not at fault. My insurance company even refunded my deductible
because of this. It's interesting to note the
van was still driveable after the incident, but the radiator failed a
couple of days later.
Thus
began the (somewhat frantic, admittedly) search for a new set of
wheels. My lady and I wanted to stick with a minivan, but neither one
of us were terribly thrilled about the current offerings from
Chrysler/Dodge (way too much highly-reflective chrome trim in the
passenger compartment, well within range of the driver's line of
vision).
Based on some serious homework, and advice from my regular mechanic, here's what we settled on.
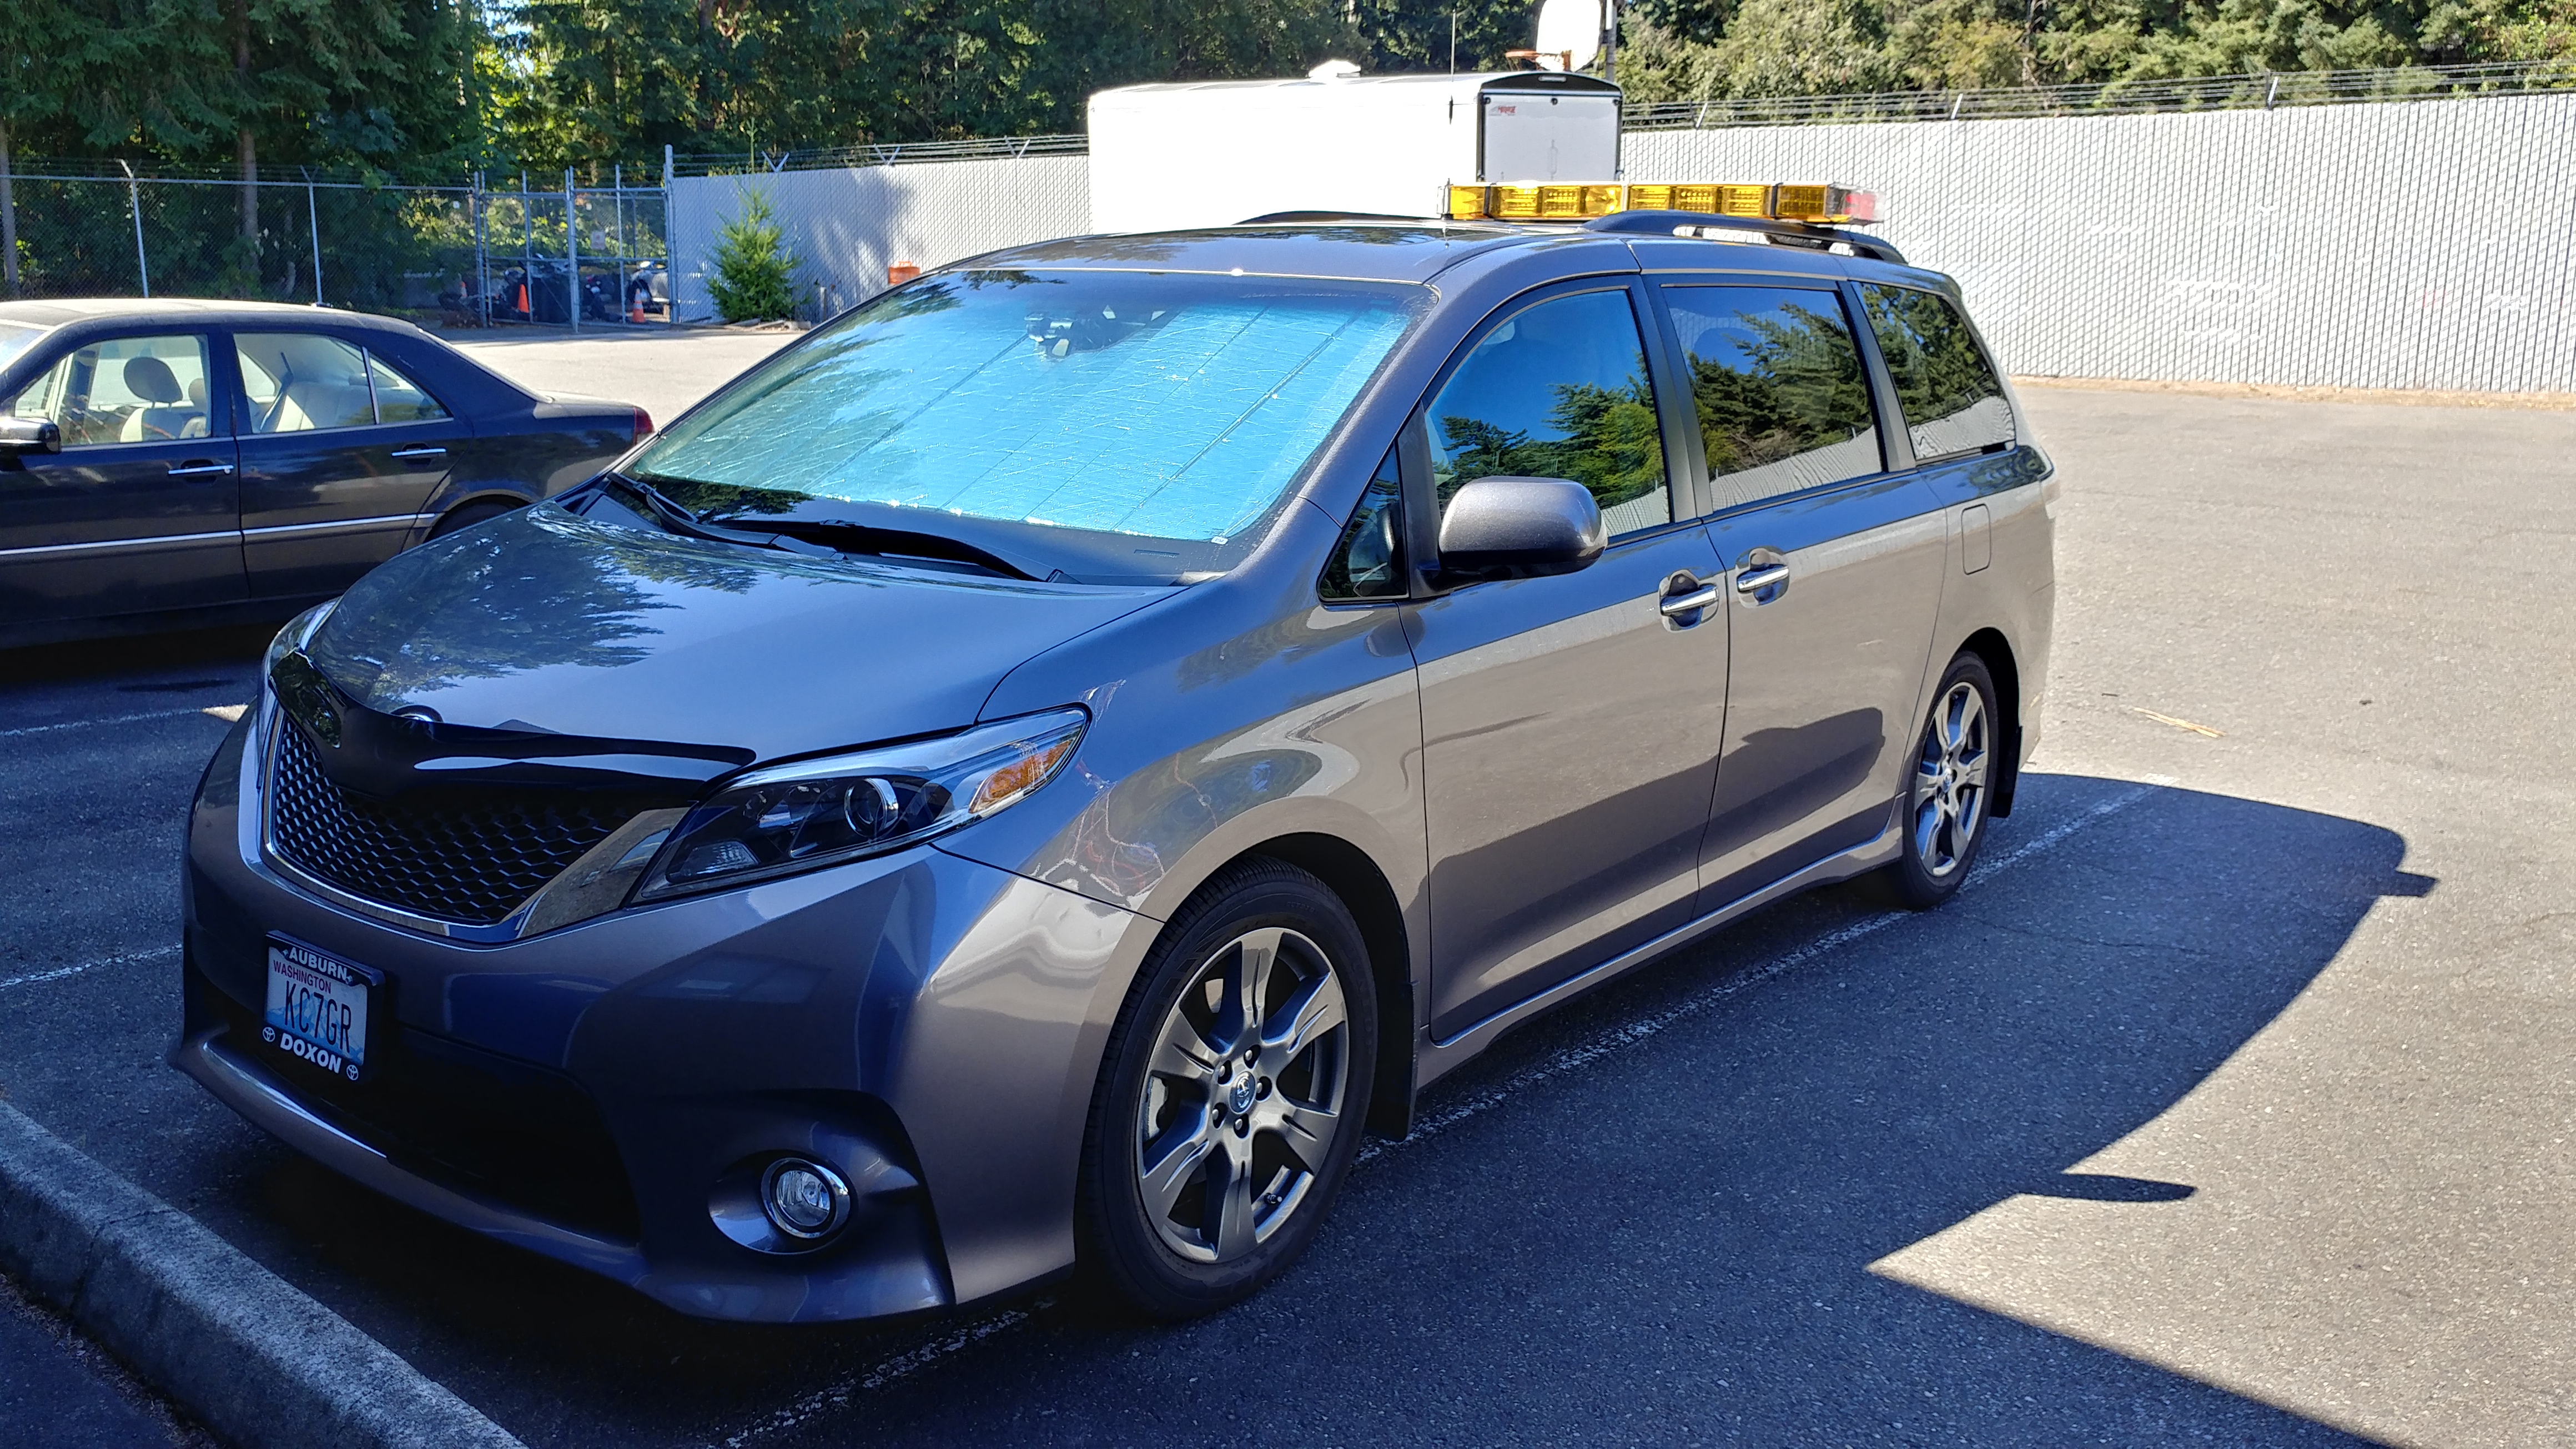
You're
looking at a 2017 Toyota Sienna SE. This was taken after I finished
refitting it with the requisite radios and supplemental safety gear.
The light bar was salvaged from the original van, and has long since
been converted to use all-LED light heads. No more
power-hungry/RF-noisy Xenon strobes or incandescents in this bar!
The
antenna arrangement has changed completely. Where the original van had
six mounts plus GPS, this one only needed two NMO mounts and an extra
'sharkfin' combo antenna (behind the light bar, not visible in this
photo). One of the two NMO's is supporting the Larsen dual-band whip
visible in the photo. The second is reserved for future use and is
currently rain-capped. The mounts, and the sharkfin, are all aligned on
the vehicle's center to provide optimal ground plane effect.
One
thing I want to mention early on: In order to do a proper antenna
installation with the Sienna vans, you HAVE to drop the headliner.
There's just no other way to do antenna and mount holes without risking serious damage to
the van's interior components, or falling back to poor-performing
thru-glass antennas.
I learned the hard way that dropping said headliner, even with a full set of instructions obtained from Toyota TIS,
is neither simple nor quick. I would strongly recommend you reserve a
full day for the job, have a friend along to help, and have a LARGE
working space available to stack all the interior trim which gets
pulled out until it's time to reinstall it. You also need the proper
tools. Get yourself a good automotive trim-removal kit, and have a
handful of spare clips and fasteners used to hold the interior trim in
place. No matter how careful you are, you're going to break at least
the 'Christmas Tree' style fasteners which hold the headliner up. It's
as inevitable as breathing!
The
reduced
antenna count was made possible by the fact the Sienna's "infotainment"
system already had full-blown GPS navigation, AM, FM, CD, USB, HDRadio,
etc. It also provides Bluetooth integration with my phone. The
original Dodge van was much too early a model year (2000) to have any
of this as standard equipment, which was why it had so many antenna
mounts and so much extra gear.
As for the sharkfin: It's
dedicated to doing GPS and 4G cellular for the Sierra Wireless modem I
installed. Besides GPS, the unit provides Internet access through a
built-in WiFi hotspot or wired Ethernet cable.
Rather than trusting some outside company with data
as potentially sensitive as my real-time location, I set up my own Traccar server on our private home network. The tracker's data goes straight to it,
which helps my wife see where I am if I happen to be on a road trip
without her along.
Moving along to the interior: Here's a photo of the rebuilt console, a Havis C-3010, the shell of which was salvaged from the original TechMobile.

The equipment shown, from left to right:
Cupholders (of course!) and widget-tray.
Modified
Bendix/King KMA-24 series aircraft audio control panel. The mods
consist of, among other things, disabling the unnecessary marker beacon
receiver (to reduce current draw and interference risks); Externalizing
the volume controls for both headset and speaker amps; And replacing
the incandescent bulbs (panel backlights) with LEDs. I found it helpful,
for that particular tweak, to use LEDs with built-in resistors
(specifically, VCC Electronics part #LTH3MM12VFR4500).
No power
conversion or modification was necessary because this particular panel
is designed to run on either 12V or 24V systems by default. The
microphone shown is dedicated to the PA function described below. The
mounting bracket for the panel had to be a custom design/cutout, since
this is not an accessory which Havis would normally build a bracket for.
Twin
Motorola XPR5550 DMR radios, one for VHF (2 meters) and one for UHF
(440 band). Both can do analog channels as well as digital, so I don't
lose any coverage on that side. The mounting brackets are Havis part
number C-EB25-MXP-1P.
Control head for the Whelen 'Smart Arrow Messenger'
on the back-side of my light bar. This is an alphanumeric sign board
which Whelen produced for the early 'Edge 9000' series bars. They've
long since stopped making them, so there was no later model made to fit
the newer 'skinny' light bars (unfortunately). It can display any one
of a library of pre-set messages, selected by number or the up/down
arrow buttons. And, by grounding a single input wire on the control
head, it can display an additional message dedicated to that input
alone. The mounting bracket is Havis P/N C-EB30-MGC-1P.
Control head for the Whelen 'CanTrol WC' system.
This is what handles all functionality for my PA, light bar, and power
switching for various accessories. Although it has full siren
capabilities, I don't have them enabled (I'm a volunteer
first-responder, not a cop-car). The PA speaker is mounted behind the
front grille on the driver's side (again, not visible in the photo),
using a pair of custom bracket pieces I fabricated from aluminum bar
stock. As for the head, it uses a standard Havis P/N C-EB40-CCS-1P.
Power switches and 12V outlets. The switches are standard Carling Technologies Contura V-Series, Contura-IV to be exact. They've been equipped with custom laser-etched rockers from Rocker Switch Pros. The panel itself is a standard Havis part number C-LP2-PS2.
Blank
3-inch filler panel, Havis P/N C-FP-3. This space is reserved for later
use (most likely a trunk-tracking scanner, when I get around to putting
one in), and currently sports a spare microphone clip to safely stash
the radio system's hand mic.
Last, but certainly not
least: A custom-designed DC distribution (via aircraft-type circuit
breakers) and audio interconnect panel. I did the design for this one
myself, using the free software from Front Panel Express.
You can design just about any kind of panel you might need, and they'll
machine it for you with any combination of colors, infill engraved
lettering (which I used here) or other graphics. They can use material
you supply, or you can have them supply it.
That's it
for now. Please feel free to drop me a note if you'd like more details
about some aspect of the installation. 73, de KC7GR!
Click here to return to the main page.